Description
How to Purchase
✅ Instant Delivery (No Physical Delivery Required)
✅ Before you buy, make sure you read the Terms and Conditions
✅ If you agree to buy, you have agreed to the terms and conditions of no refunds if the reason is as described Terms and Conditions
✅ License for one PC, and cannot be transferred to another PC
✅ Active Period: Lifetime (can reinstall)
✅ Support: Windows 10, 11
✅ Update Application: No
✅ Install Instructions: Available (video/text)
✅ It should be noted, buying = understanding product use
Note:
Files & Prices may increase or decrease at any time
Description:
JpegMedicARWE V.2.22.8.12
is a tool for 100% automatic batch recovery of JPG files partially encrypted by ransomware. The utility is a small brother of JpegMedic, a professional tool to recover damaged JPG files. JpegMedic recover JPG images encrypted by ransomware too, but it offers more control and more recovery features compared with JpegMedic ARWE.
Ransomware is a type of malware that encrypts some of your crucial files and then ransoms for money to decrypt them. The type and amount of damages to a file caused by encryption depend on what ransomware did it. However, many types of ransomware widespread in the wilderness today only encrypt the beginning of a file. Supposedly, they do it to speed up the encryption of the system. While for many files such damage would be critical, JPG files can be recovered with JpegMedic ARWE.
JpegMedic ARWE has two basic file recovery modes. The first one requires one non-damaged JPG file created by the same camera with the same settings as damaged images. Then, with quantization tables, Huffman tables and other technical parameters borrowed from the healthy file the program attempts to recover the non-encrypted part of the encrypted file. The second mode does not require a correct file. Instead, it uses complex heuristic algorithms to identify technical parameters of the image. This method is able to recover non-encrypted part of the encrypted file completely automatically. The drawback of the second mode is its relatively low operation speed. However, no matter which method you choose, you end up with a restored image that only lacks a few first lines and has slightly different gamma.
Also, JpegMedic ARWE can be used to extract JPG thumbnails from encrypted RAW files created by modern digital cameras. The size of such JPG files is comparable with the size of the photograph. If the beginning of the thumbnail is partially encrypted, such thumbnail can be restored using the same principles as for a regular JPG file. That is, you need one correct RAW file created by the same camera with the same settings as the damaged RAW file. The program was tested with the following types of RAW files: 3FR, ARW, CR2, CR3, CRW, DNG, NEF, NRW, ORF, PEF, PTX, RAF, RAW, RW2, RWL, SR2, SRF, X3F.
Currently, there is no complete list of ransomware that only encrypts the beginning of a file. JpegMedic ARWE was tested and successfully recovered JPG files with the following extensions after encryption:
|
|
|
|
|
|
|
If you managed to recover JPG files with other additional extensions using the program, please let us know about that and we will add this information to the list. This will allow other users to quickly find a solution if their system will also fall a victim to some ransomware.
If you do not see the file extension of the encrypted file in the list, and JpegMedic ARWE produces an error message if you attempt to recover such a file, you can send to us several samples of encrypted files. We will analyze them and if possible will add the support for such files to the program. Please don’t forget to send us a correct non-encrypted file created by the same camera with the same settings because it is required to analyze the encrypted image.
Some ransomware encrypt not only the beginning of the file, but also fragments in the middle and in the end of the file. This makes automatic recovery of such files impossible. But in some specific cases you still can attempt to recover such files manually. Modern cameras can add to the JPG files additional thumbnails in a relatively good resolution. Such thumbnails are written after the main image to the same file. And ransomware encrypts the beginning and the middle of the original image plus the end of the thumbnail. So the original image can be manually recovered using JpegMedic by merging non-damaged parts of the main image and the thumbnail. Unfortunately, such recovery is more of an art than of a craft, so it hardly can be automated. For more information about non-standard recovery, please refer to the JpegMedic manual.
Working with the program
After you start the program, you see a window where you need to fill a few boxes:
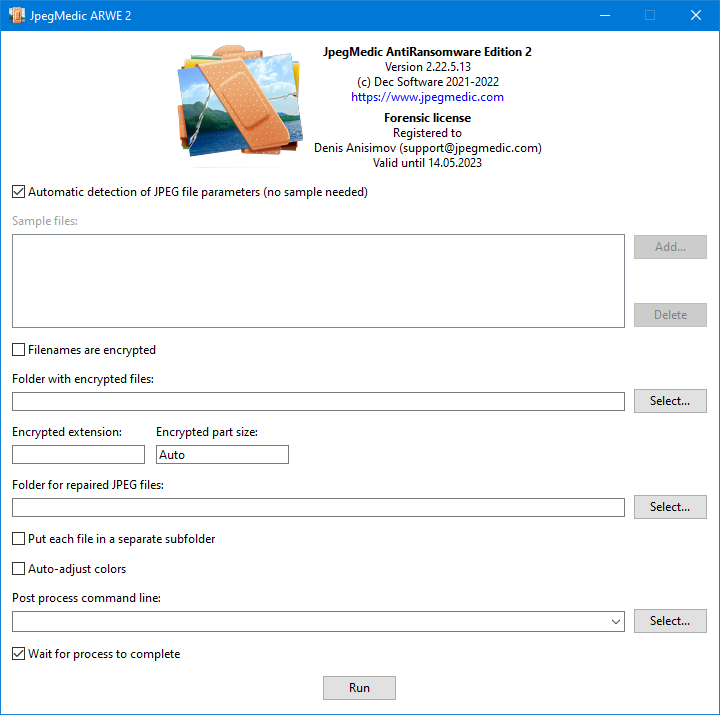
The Automatic detection option selects the recovery mode that does not need a sample of a correct file. This option is on by default. In case you have a correct file created by the same camera with the same settings as damaged images, we recommend turning this option off and use the sample file instead. This speeds up recovery and improves accuracy of recovered colors of the image.
The Sample files field allows you to select one or more correct JPG files or RAW files if you plan to extract JPG thumbnails for encrypted RAW files. The technical information from these files will be used to decode encrypted files. Importantly, the added sample images must be made with the same camera as the encrypted files. Using technical information from incorrect samples does not allow recovery of encrypted files.
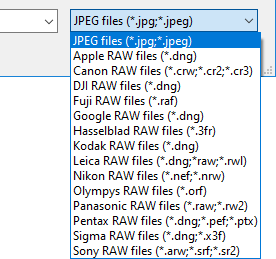
When you click the Add button, a window opens where you can select a sample file. By default, this window displays only JPG files. If you want to add a RAW file, simply select the type of RAW files in the dropdown list:
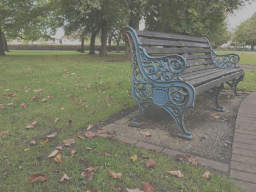
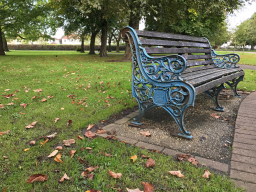
The crucial part of the selected samples is quantization tables. It is these tables the accuracy of colors in the restored images depends on. The more similar quantization tables of the sample and of the original encrypted image are, the better will be the resulting colors after recovery of the image. Too bleak or too saturated colors on the recovered image are a first sign of non-matching quantization tables.
 |
 |
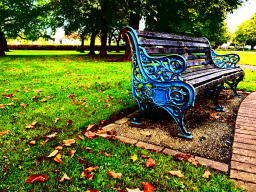 |
| Too bleak | Normal | Too saturated |
Some cameras use fixed quantization tables when creating JPG files or JPG thumbnails inside RAW files, regardless of the shooting mode. From the point of recovery of damaged files, this is the best possible option. In this case, you need to add just one sample image, and it will do well for all files being recovered.
Other cameras can use varying quantization table, depending on current camera settings, lighting level and other factors. This situation makes it much harder or even impossible to find a single universal sample image that allows for correctly recovered colors of all encrypted images. In this case you better try to select several JPG or RAW sample photos made in various shooting modes. If multiple samples are provided, the program will create several variants of the recovered image for every processed file. Then, you only need to pick the best looking one. Also, you can turn on the Auto-adjust colors option. With this option, the program tries to select the optimal quantization table. Or you can eliminate discrepancy of quantization tables manually, on the post-processing stage (see below).
If as a result of infection you now do not have any files to provide as a sample, you can take a few shots with the same camera that the encrypted photographs were made. If you do not own that camera anymore, you can attempt to find some samples in the internet using a similar search query “%Your camera name% image samples”. There are multiple websites on the web with digital camera reviews. On such sites you can typically find lots of sample photographs for any given camera model.
Cameras allow to take shots with different sizes. A common mistake is to use a sample with the incorrect size. For instance, if your encrypted file has the resolution of 4000×3000 pixels, and you provided a 6000×4000 pixels sample, the JpegMedic ARWE will not be able to correctly recover the image. If the sample size is smaller than the size of the encrypted file, an attempt to recover such an image will most likely ends up with the FAILED message. And if the size of the sample if bigger than the size of the encrypted file, you will see a banded image instead of the original photo:

If you experience difficulty finding a suitable sample, you can send one encrypted file to us and specify exactly what camera it was made with. We will try analyzing this file and find a matching correct sample to it.
The Folder with encrypted files field denotes the folder where the damaged image files are. When ransomware encrypts files it adds an additional extension to each file, so JpegMedic ARWE expects that the specified folder contains files in the following name format: NAME.JPG.EXT or NAME.JPEG.EXT or NAME.RAW.EXT, depending on what sample files you selected in the Sample files field. Here, RAW is the real extension of a RAW file (for instance, if you selected a CR2 file as a sample, RAW is CR2), and EXT is that additional extension.
After you select the folder, the program scans it for files and attempts to determine the additional extension (EXT) automatically. Then, it inserts the extension to the Encrypted extension box. If the program failed to determine the extension automatically or determined it incorrectly, you can enter the correct value manually. This value is important, because JpegMedic ARWE will only process files named as NAME.JPG.EXT or NAME.JPEG.EXT or NAME.RAW.EXT, depending on what sample files you selected in the Sample files.
Some types of ransomware encrypt both file contents and file names. In this case the normal name, such as IMG_750.JPG may turn into something unreadable like 5_6061924898933048733.avyu. If that’s the case, JpegMedic ARWE will not be able to identify image files to recover during encrypted files analysis. Enable the Filenames are encrypted option then. If this option is on, the program ignores file extensions and attempts to recover files from the selected folder matching the NAME.EXT wildcard.
The Encrypted part size parameter determines the size of the encrypted part of a file. Normally, you don’t know that size, however in many cases it is 153605 bytes, so this is the default value. If you believe this value is incorrect in your case, you can determine the proper value with some additional research using JpegMedic or by asking on the specialized forums.
The Folder for repaired files specifies the folder to save repaired JPG files. The program fills this field automatically by copying the value from the Folder with encrypted files field and adding the Repaired subfolder to the path, but you can specify your own folder.
Important: we recommend to always specify an empty folder to avoid the situation when JpegMedic ARWE would occasionally overwrite the existing correct files.
The Put each file in a separate subfolder option is useful when multiple correct sample JPG or RAW images are provided. If this option is on, the program will create a subfolder for every file being recovered where all restored variants are saved.
If you cannot find a correct sample JPG image with quantization tables suitable for your files, and the resulting images have unnatural colors – too bleak or too saturated, you can turn on the Auto-adjust colors option. This option tells JpegMedic ARWE to attempt to select the optimal quantization table automatically. Also you can try to apply automatic color correction in some graphical software. Typically, you would do this manually after all JPG files are recovered, but if the software supports command line parameters you can execute it directly from JpegMedic ARWE. Use the Post process command line box for that. There, you can enter the execution command line of the application you want JpegMedic ARWE to run after saving the recovered file.
For example, let’s take IrfanView. This program has automatic color correction and support command line parameters as well. In any folder create a text file named i_view64.ini if you use the 64-bit version of IrfanView, or i_view32.ini if you use the 32-bit version. Copy the below lines to this file:
[JPEG]
Save Quality=80
KeepExif=1
[Batch]
AdvAutoRGB=1
In JpegMedic ARWE , in the Post process command line box insert the following line:
“c:\Program Files\IrfanView\i_view64.exe” “%1″ /ini=”D:\IniPath\” /advancedbatch /convert=”%1″
Make sure to provide the correct path to IrfanView if it is installed in another folder. Insert the real path to i_view64.ini instead of D:\IniPath\. Do not include i_view64.ini to the path. The %1 string is a service part of the command line, JpegMedic ARWE will substitute the full name of the saved file in place of this placeholder, without quotes.
With such settings JpegMedic ARWE will execute IrfanView for automatic color correction for every saved JPG file that the program has successfully recovered.
The Wait for the process to complete option sets whether JpegMedic ARWE should wait for the executed application to finish its work and сlose, or it should continue processing directly after it starts the external application. Generally, we recommend leaving this option on.
After filling all the boxes, click the Run button to start automatic recovery. JpegMedic ARWE goes through every files in the specified folder that match the NAME.JPG.EXT or NAME.JPEG.EXT or NAME.RAW.EXT formats, depending on what sample files you selected in the Sample files, one by one, applies all necessary transformations and saves the resulting file in the destination folder, but without the additional extension EXT. Subfolders are not processed, so if you need to recover files from multiple folders, you need to run recovery for each such folders individually. If the Filenames are encrypted is selected, the program processes all files that match the NAME.EXT wildcard.
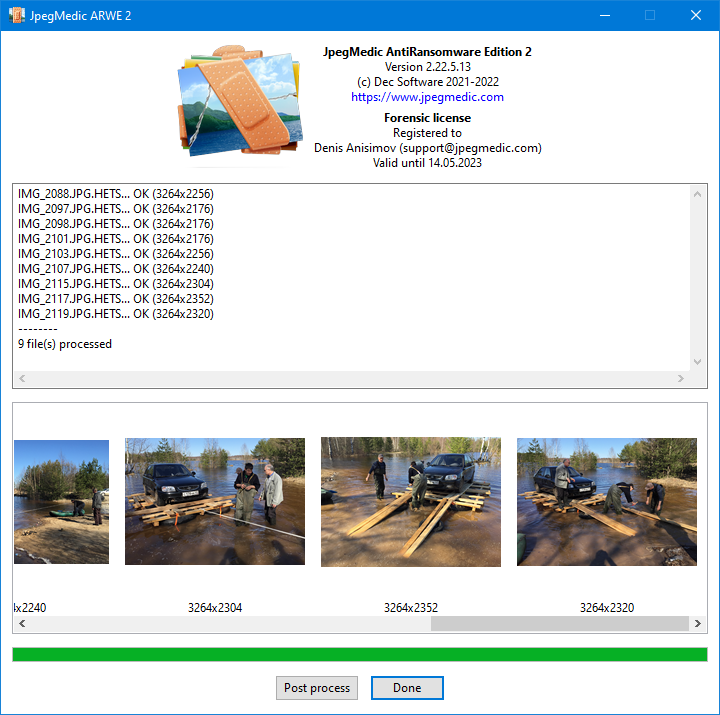
As the recovery process continues, the program reports filenames of recovered files in the list and also shows thumbnails of recovered JPG images so you can quickly estimates the recovery result. After the repairing finishes, the program shows the total amount of processed files and the number of files that it failed to recover for some reason.
After the program finishes processing of all files, you can apply color correction directly in the program. To do this, click the Post process button. The window will expand full screen:
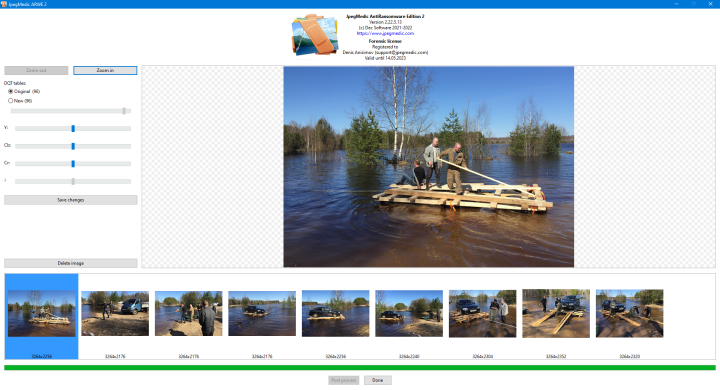
The appearance of the window also changes. The list of all images in the bottom of the window now contains a cursor showing the currently selected image. The textbox containing recovery results disappears to make room for a bigger preview window where the currently selected image is shown. And the left part contains additional instruments.
The Zoom out and Zoom in buttons allows you to adjust the scale of the image. You can also do this using the + and – keys on the numpad or with the mouse wheel with pressed Ctrl key as long as the mouse cursor is over the image.
If the quantization tables of the sample and the recovered image are significantly different, and the recovered photo looks too bleak or too saturated, you can try to fix that by switching quantization tables. To do this, in the DQT tables section select New, and then move the corresponding slider to correct the colors.
Important! New quantization tables may not match the tables originally found in the encrypted file. As a result, some visual artifacts may arise, like shown on this example:
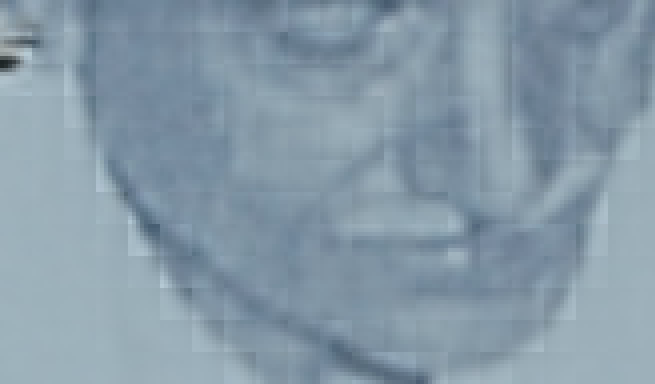
That is why we recommend selecting quantization tables by visually controlling changes of the zoomed in image.
The sliders Y, Cb and Cr allow adjusting levels of the corresponding color channels.
To apply all changes you have made, click the Save changes button.
The Delete image button removes the recovered file from the disk and deletes its thumbnail in the list of files. This function can be useful if you initially provided several samples with different parameters. In this case, the program will create several versions of the recovered file based on each provided sample. This button allows you to delete ones you don’t need directly from the program.
If you have difficulties while recovering your files, you can use our paid recovery service instead. To do this, please contact us by email. In your message, tell us the number of file you need to recover, and send several samples of the encrypted JPG files to us. We will reply shortly with the estimation of the cost of recovery in your case.
Video demonstration:


Reviews
There are no reviews yet